I’ve struggled with this project in the past. The main guides are buried under dozens of comments, with more after — sometimes with conflicting advice. I’ll try to document the best method I found in one place. If you have any issues or need clarification, drop me a note and I’ll do my best to update it.
Much of this is thanks to this Home Assistant community post for laying the groundwork.
How this works
- A switch is added to HomeKit from Home Assistant
- Every two minutes, Home Assistant flips that switch
- Which triggers a HomeKit automation, created in Shortcuts
- That sends the temperature and humidity values from HomeKit to Home Assistant
Home Assistant setup
Prerequisites
- Your HomePods added to Home Assistant using the Apple TV integration — it’s just easier
- An iPhone or iPad with the Shortcuts app and your Apple Home installed
Step 1 — Create an input_boolean
This is the switch Home Assistant will toggle to trigger the Shortcuts automation.
Go to Settings → Devices & Services → Helpers → New Helper and create an Input Boolean. I call mine Homekit Sensors Update.
It must be exposed to HomeKit via the HomeKit integration — we’ll configure that in Step 2.
Step 2 — Add the input_boolean to a HomeKit Bridge
This allows HomeKit to see when it should request sensor data from the HomePods.
Go to Settings → Devices & Services → Integrations. If HomeKit isn’t listed, add the integration:
- Set Domains to include to Input Boolean
- Pair it to HomeKit by scanning the QR code with the Home app on your iPhone
- Make sure the integration includes the
input_booleanyou created in Step 1
I add mine as a separate bridge entry from other devices I expose to HomeKit. Check the Home app on your iPhone or iPad to confirm it’s showing.
Step 3 — Create a Home Assistant automation
This automation flips the input_boolean every two minutes, which triggers the Shortcuts automation on the HomeKit side.
Go to Settings → Automations & Scenes → Automations → New Automation, switch to YAML mode, and paste the following:
alias: Homekit - Sensor Collection
description: Processes temperature and humidity data from the HomePod Mini
triggers:
  - minutes: /2
    id: time
    trigger: time_pattern
actions:
  - target:
      entity_id: input_boolean.homekit_sensors_update
    action: input_boolean.turn_on
    data: {}
  - delay: "00:00:05"
  - target:
      entity_id: input_boolean.homekit_sensors_update
    action: input_boolean.turn_off
    data: {}
mode: single
Step 4 — Enable the REST API and generate an API key
The REST API is enabled by default in most modern Home Assistant installations. Confirm by checking your configuration.yaml file — look for api: in the default_config section.
To generate an API key, go to your profile → Security tab → Long-lived access tokens. Create a token for your HomePods and save it somewhere accessible from your iPhone or iPad — you’ll need it in Shortcuts.
The Home Assistant API documentation has more detail if you run into trouble.
Shortcuts setup
The Mac version of Shortcuts doesn’t always display all the options described here. If you can’t find something, try your iPhone instead.
Step 5 — Collect sensor values
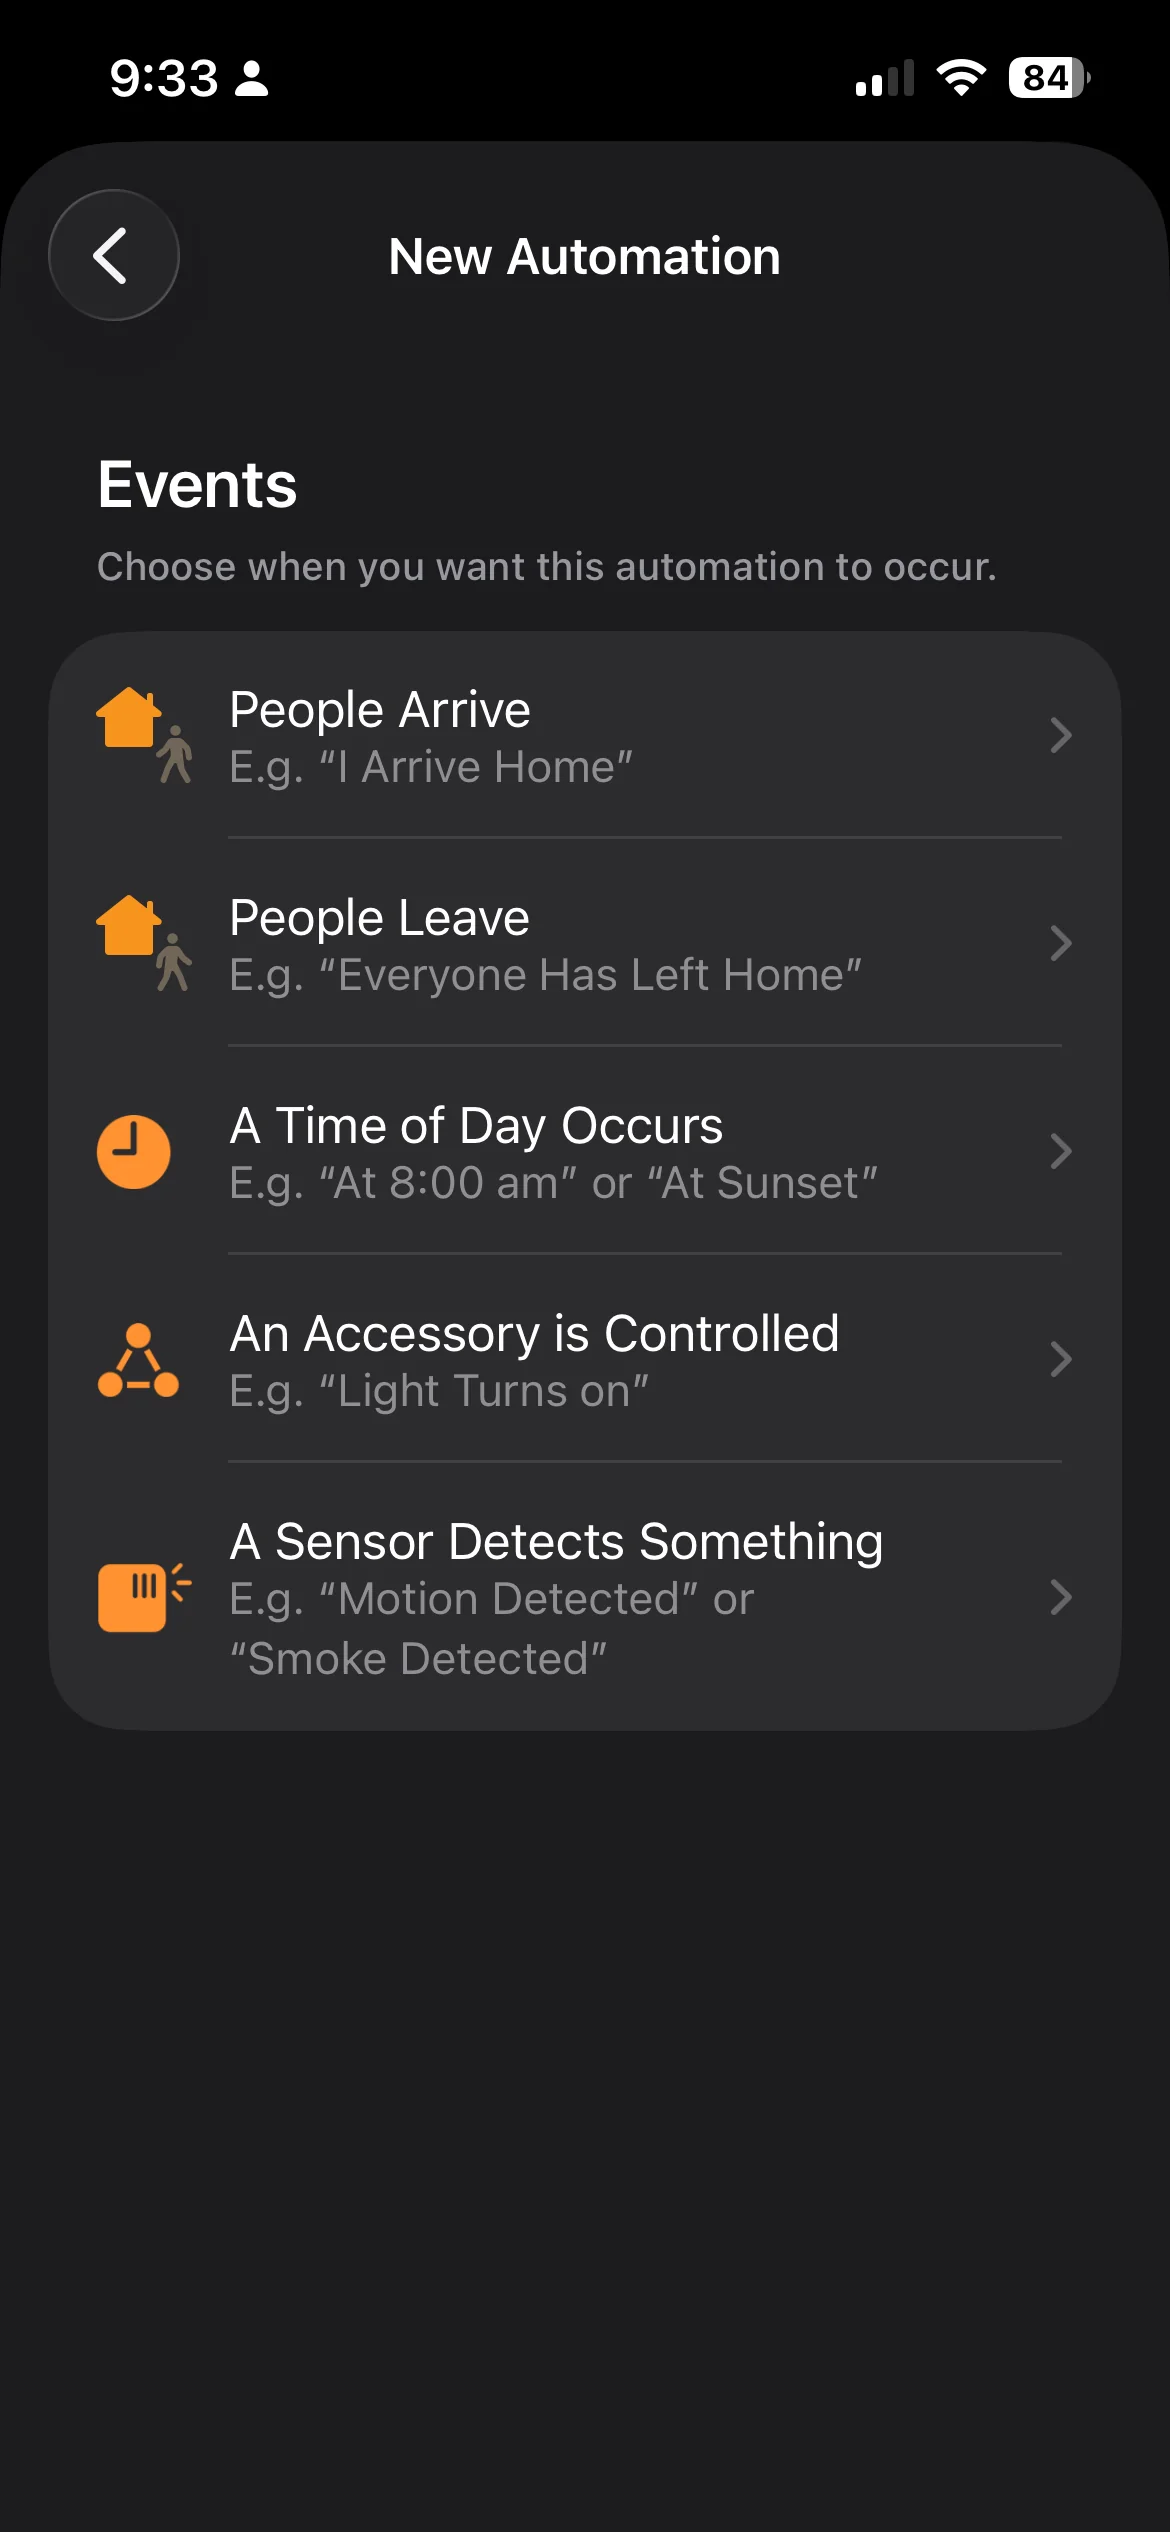
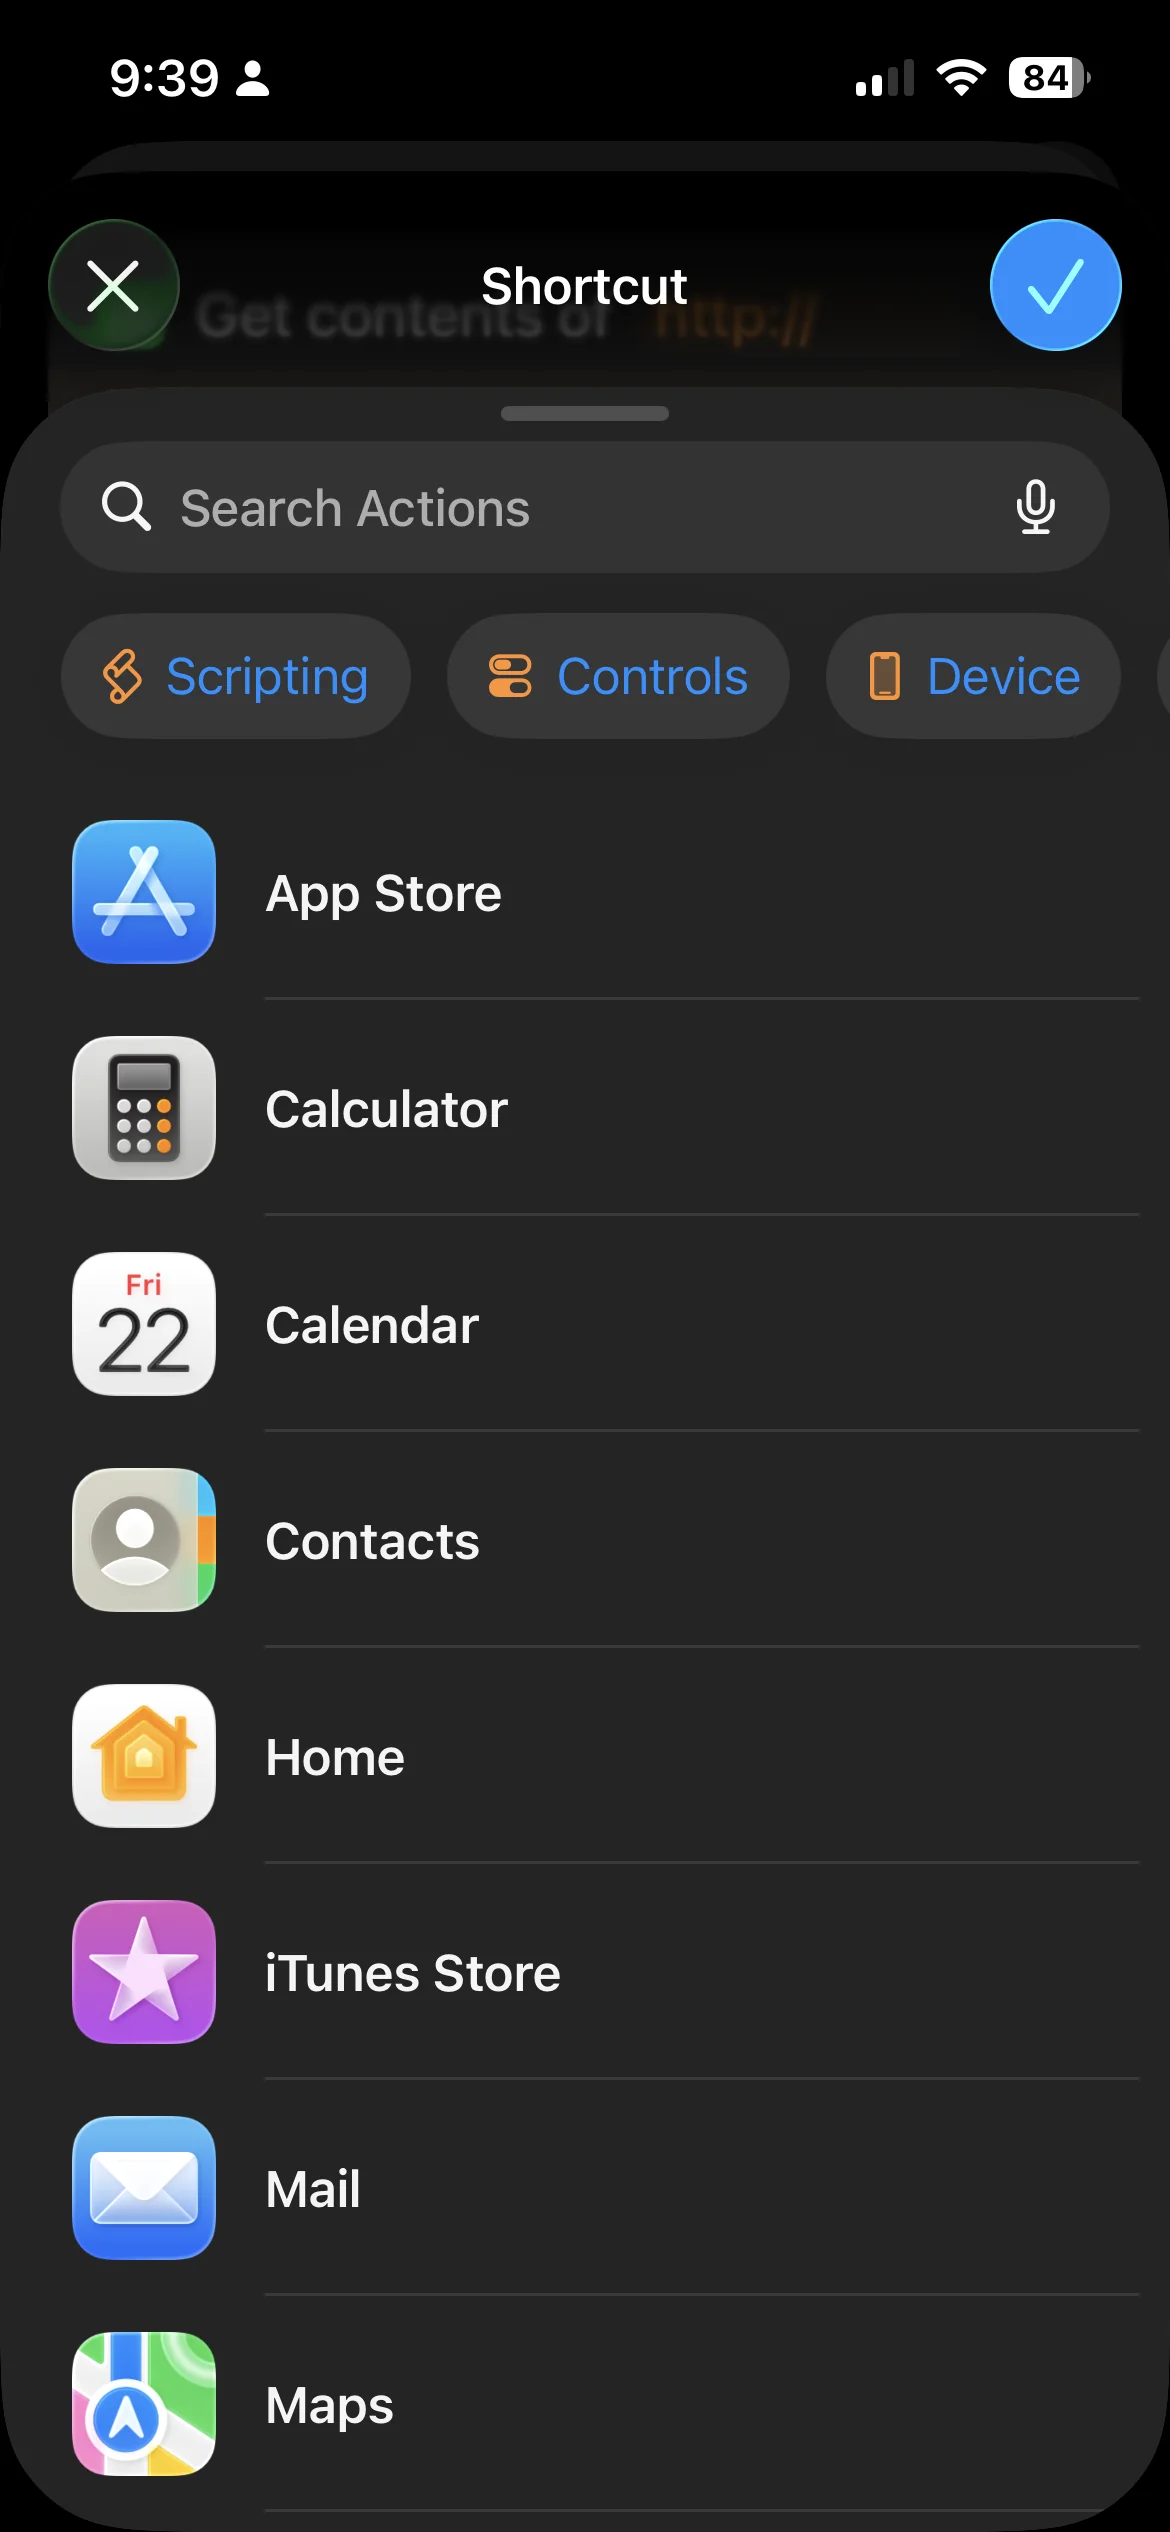
Open Shortcuts and go to Automations. Tap Add Automation, then at the bottom of the list tap Create Home Automation under the Home Automation section.
Configure it as follows:
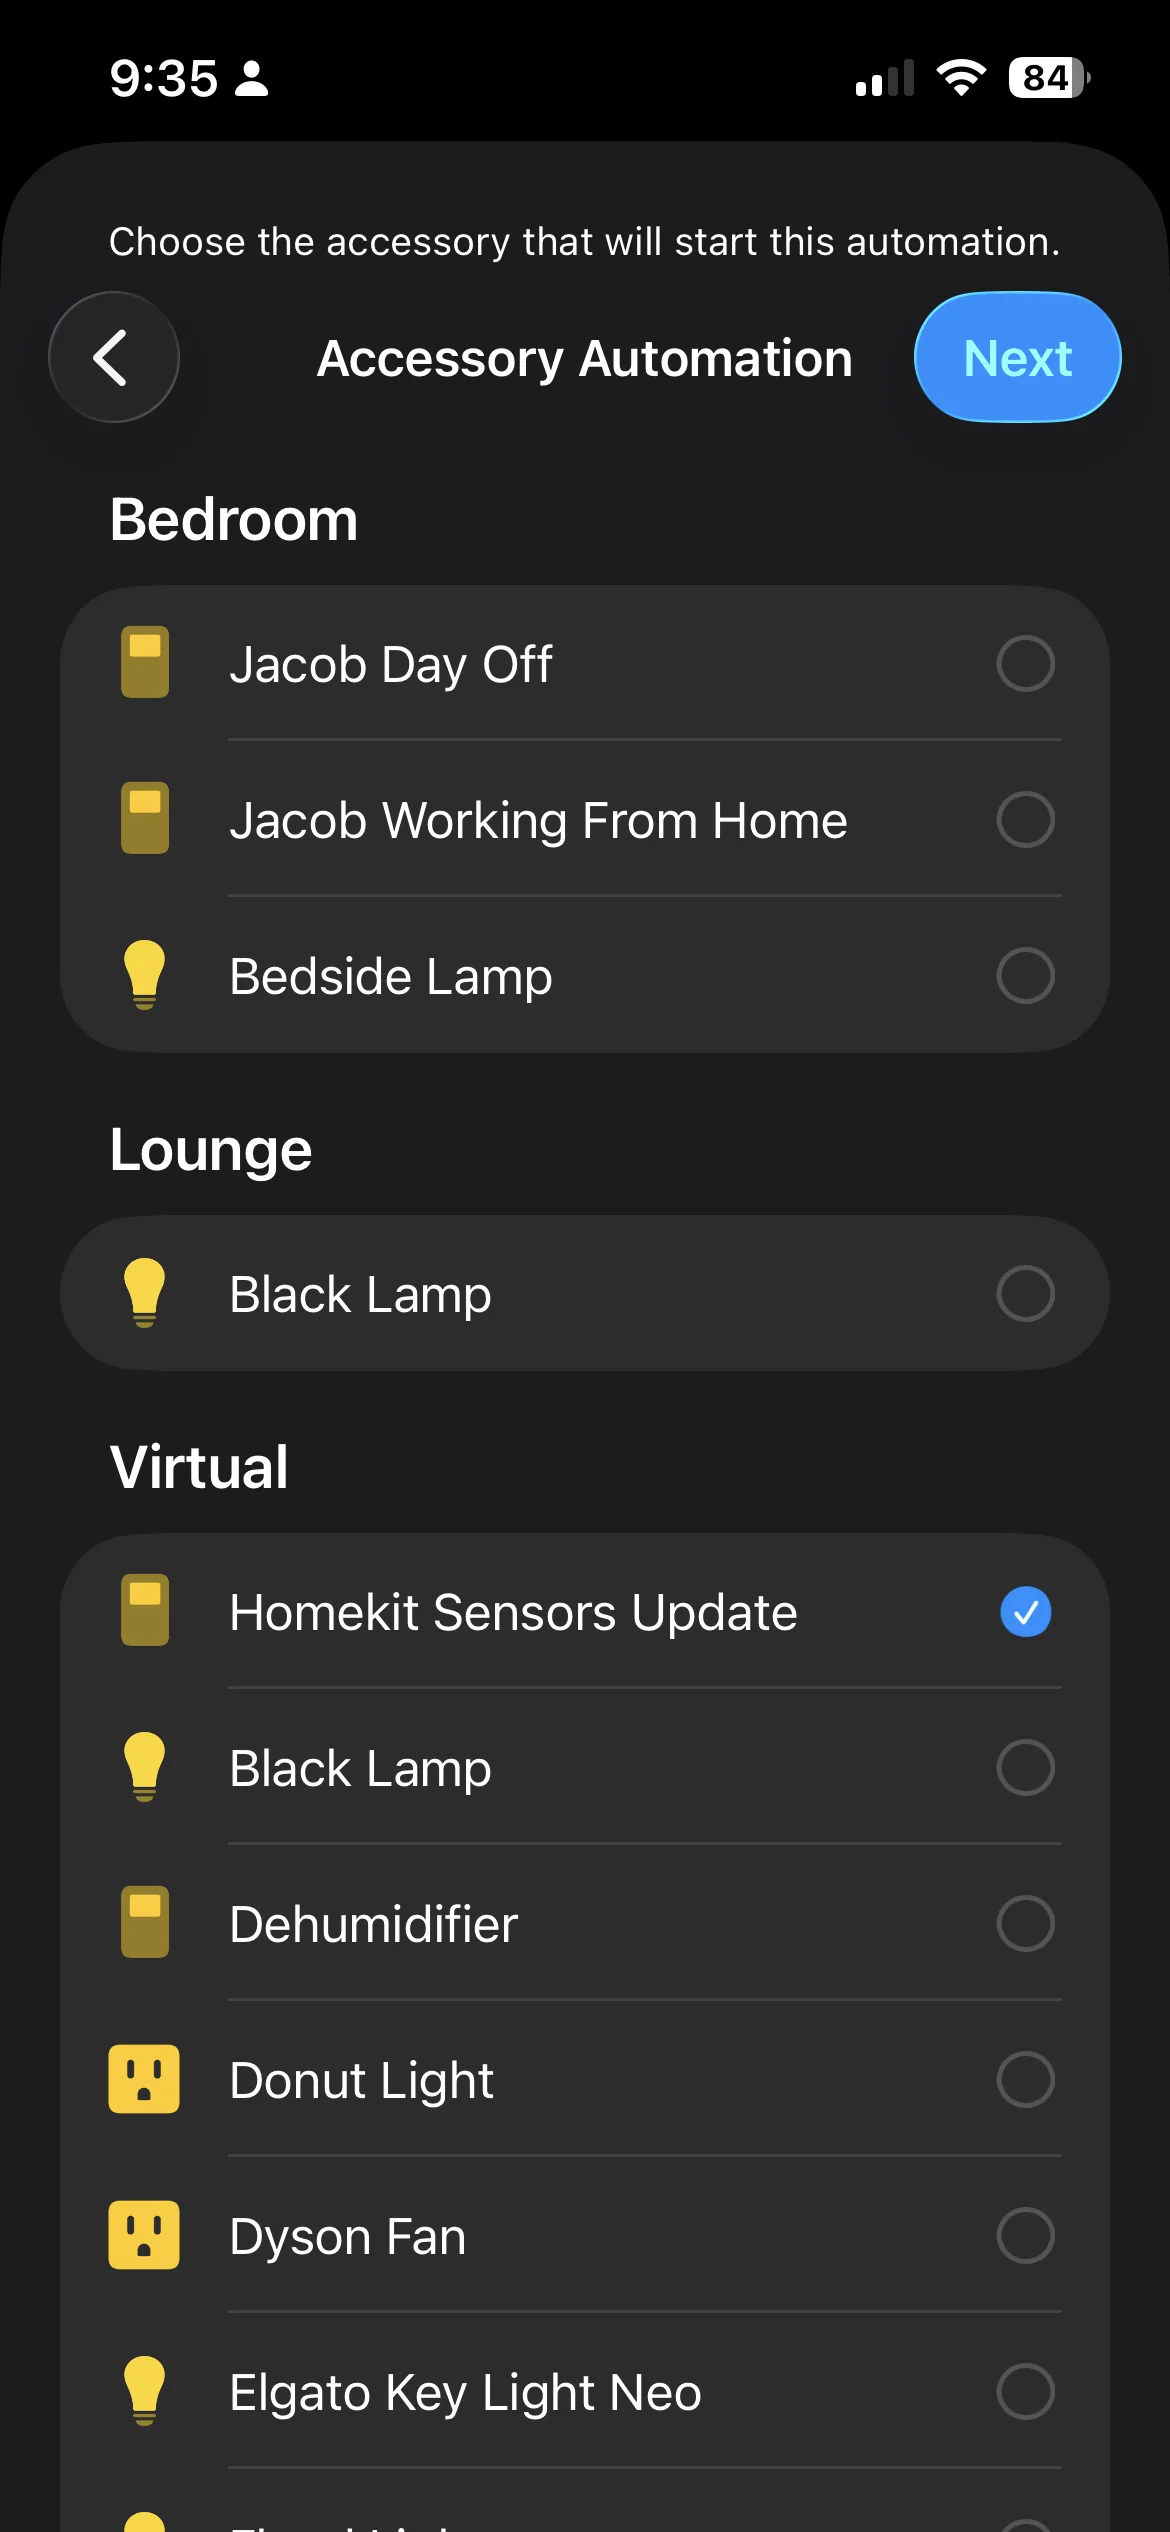
- Event: An Accessory is Controlled
- Select: your Homekit Sensors Update switch (it appears under the Virtual group)
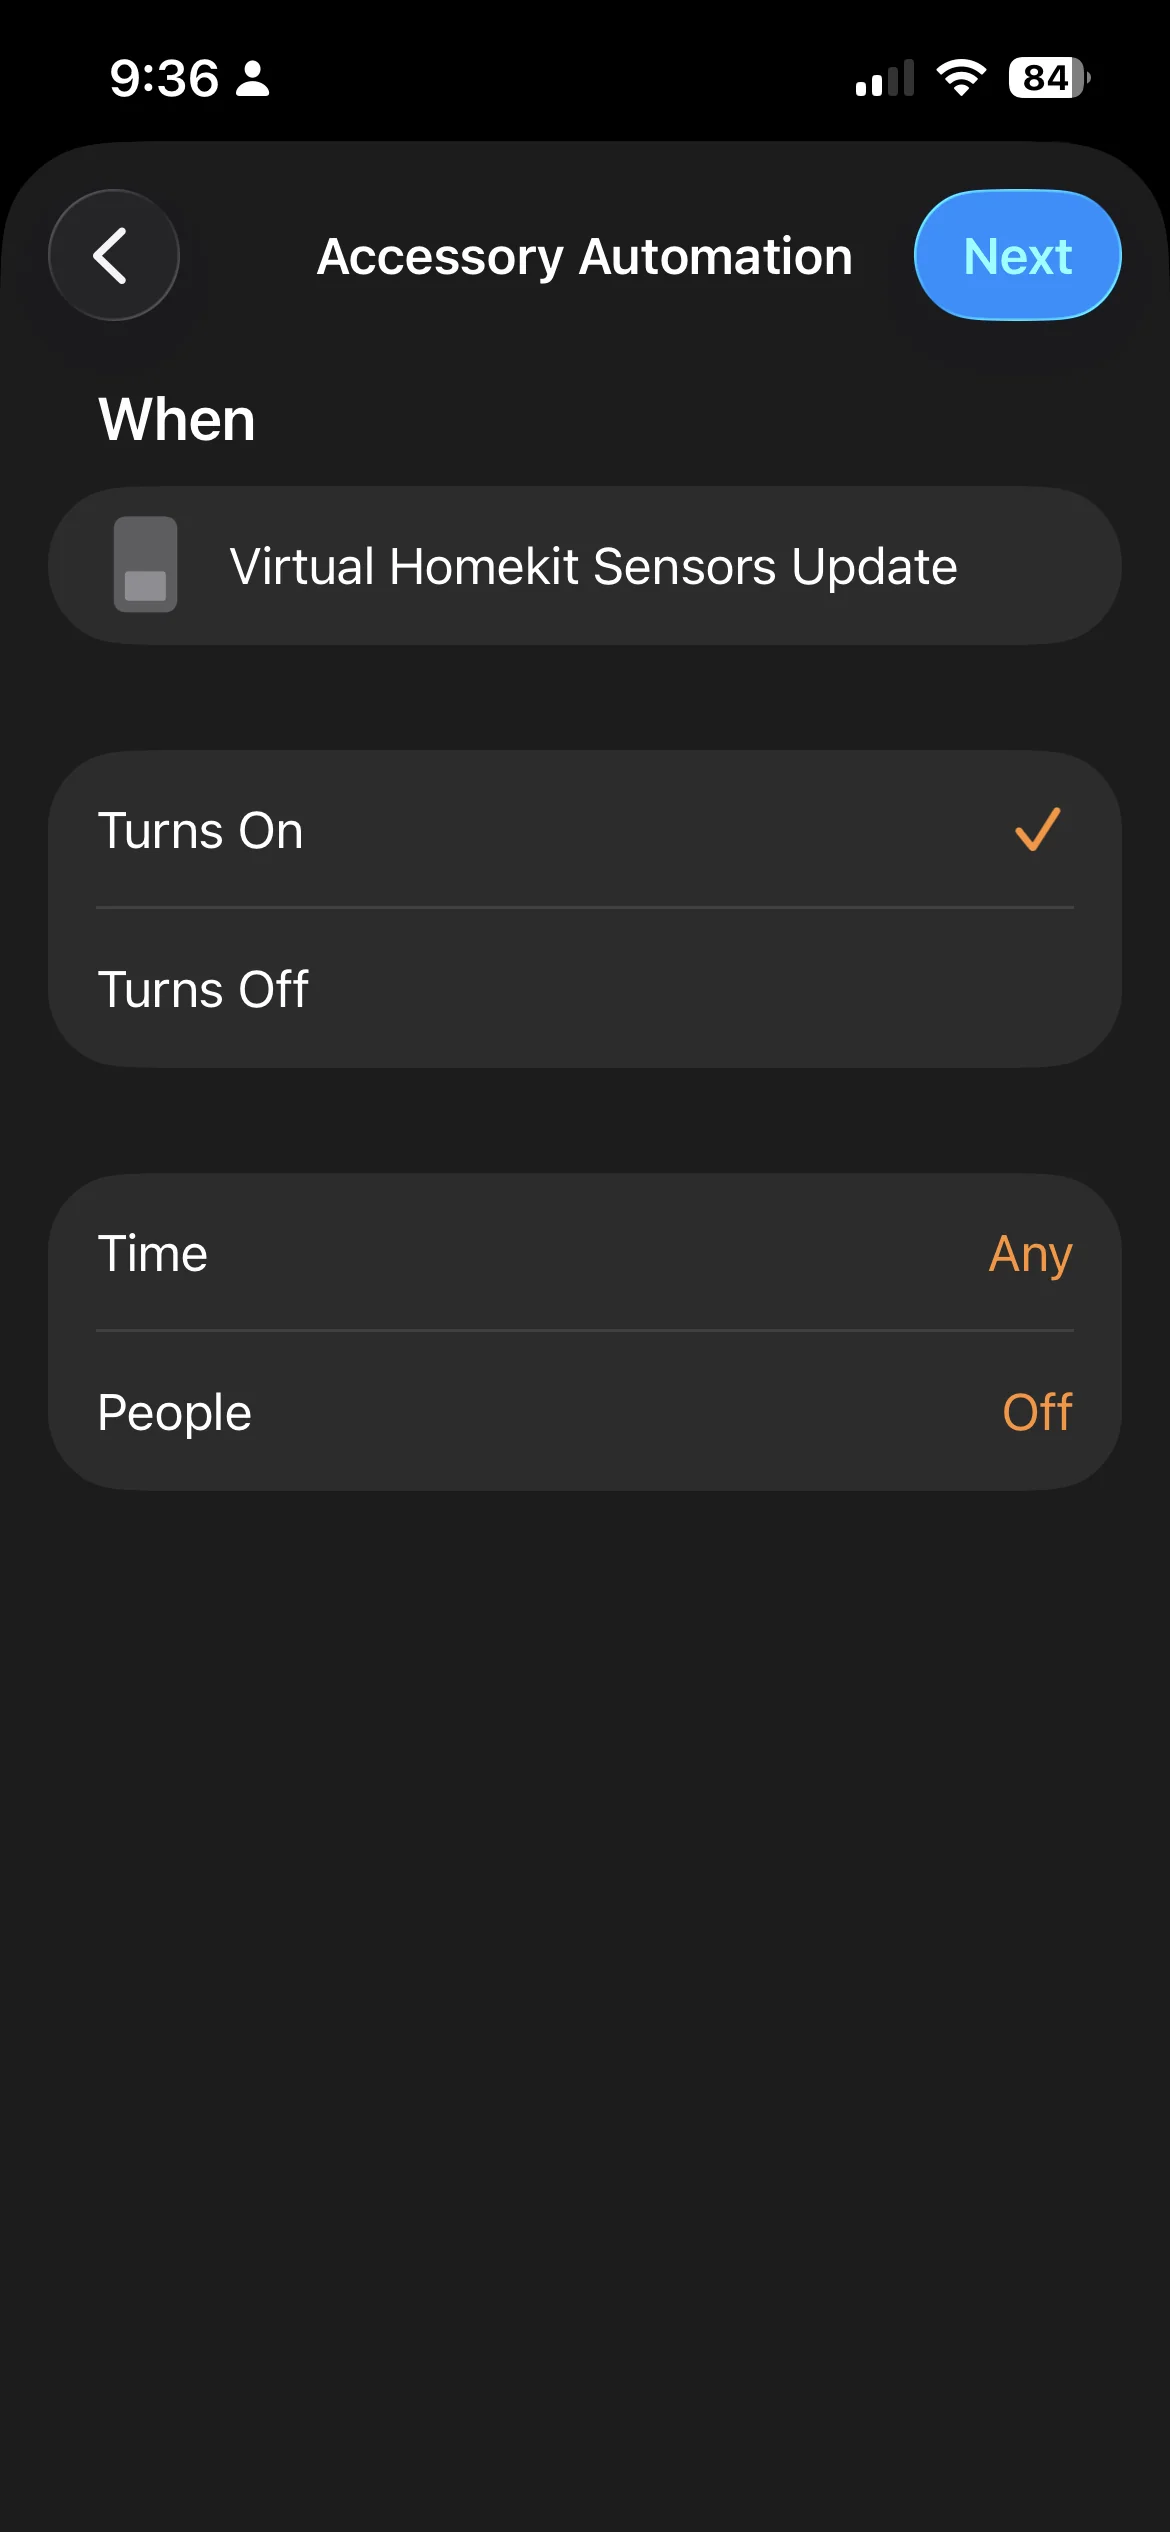
- Trigger: when it Turns On, at any time
- Don’t select any devices — tap Convert to Shortcut at the bottom

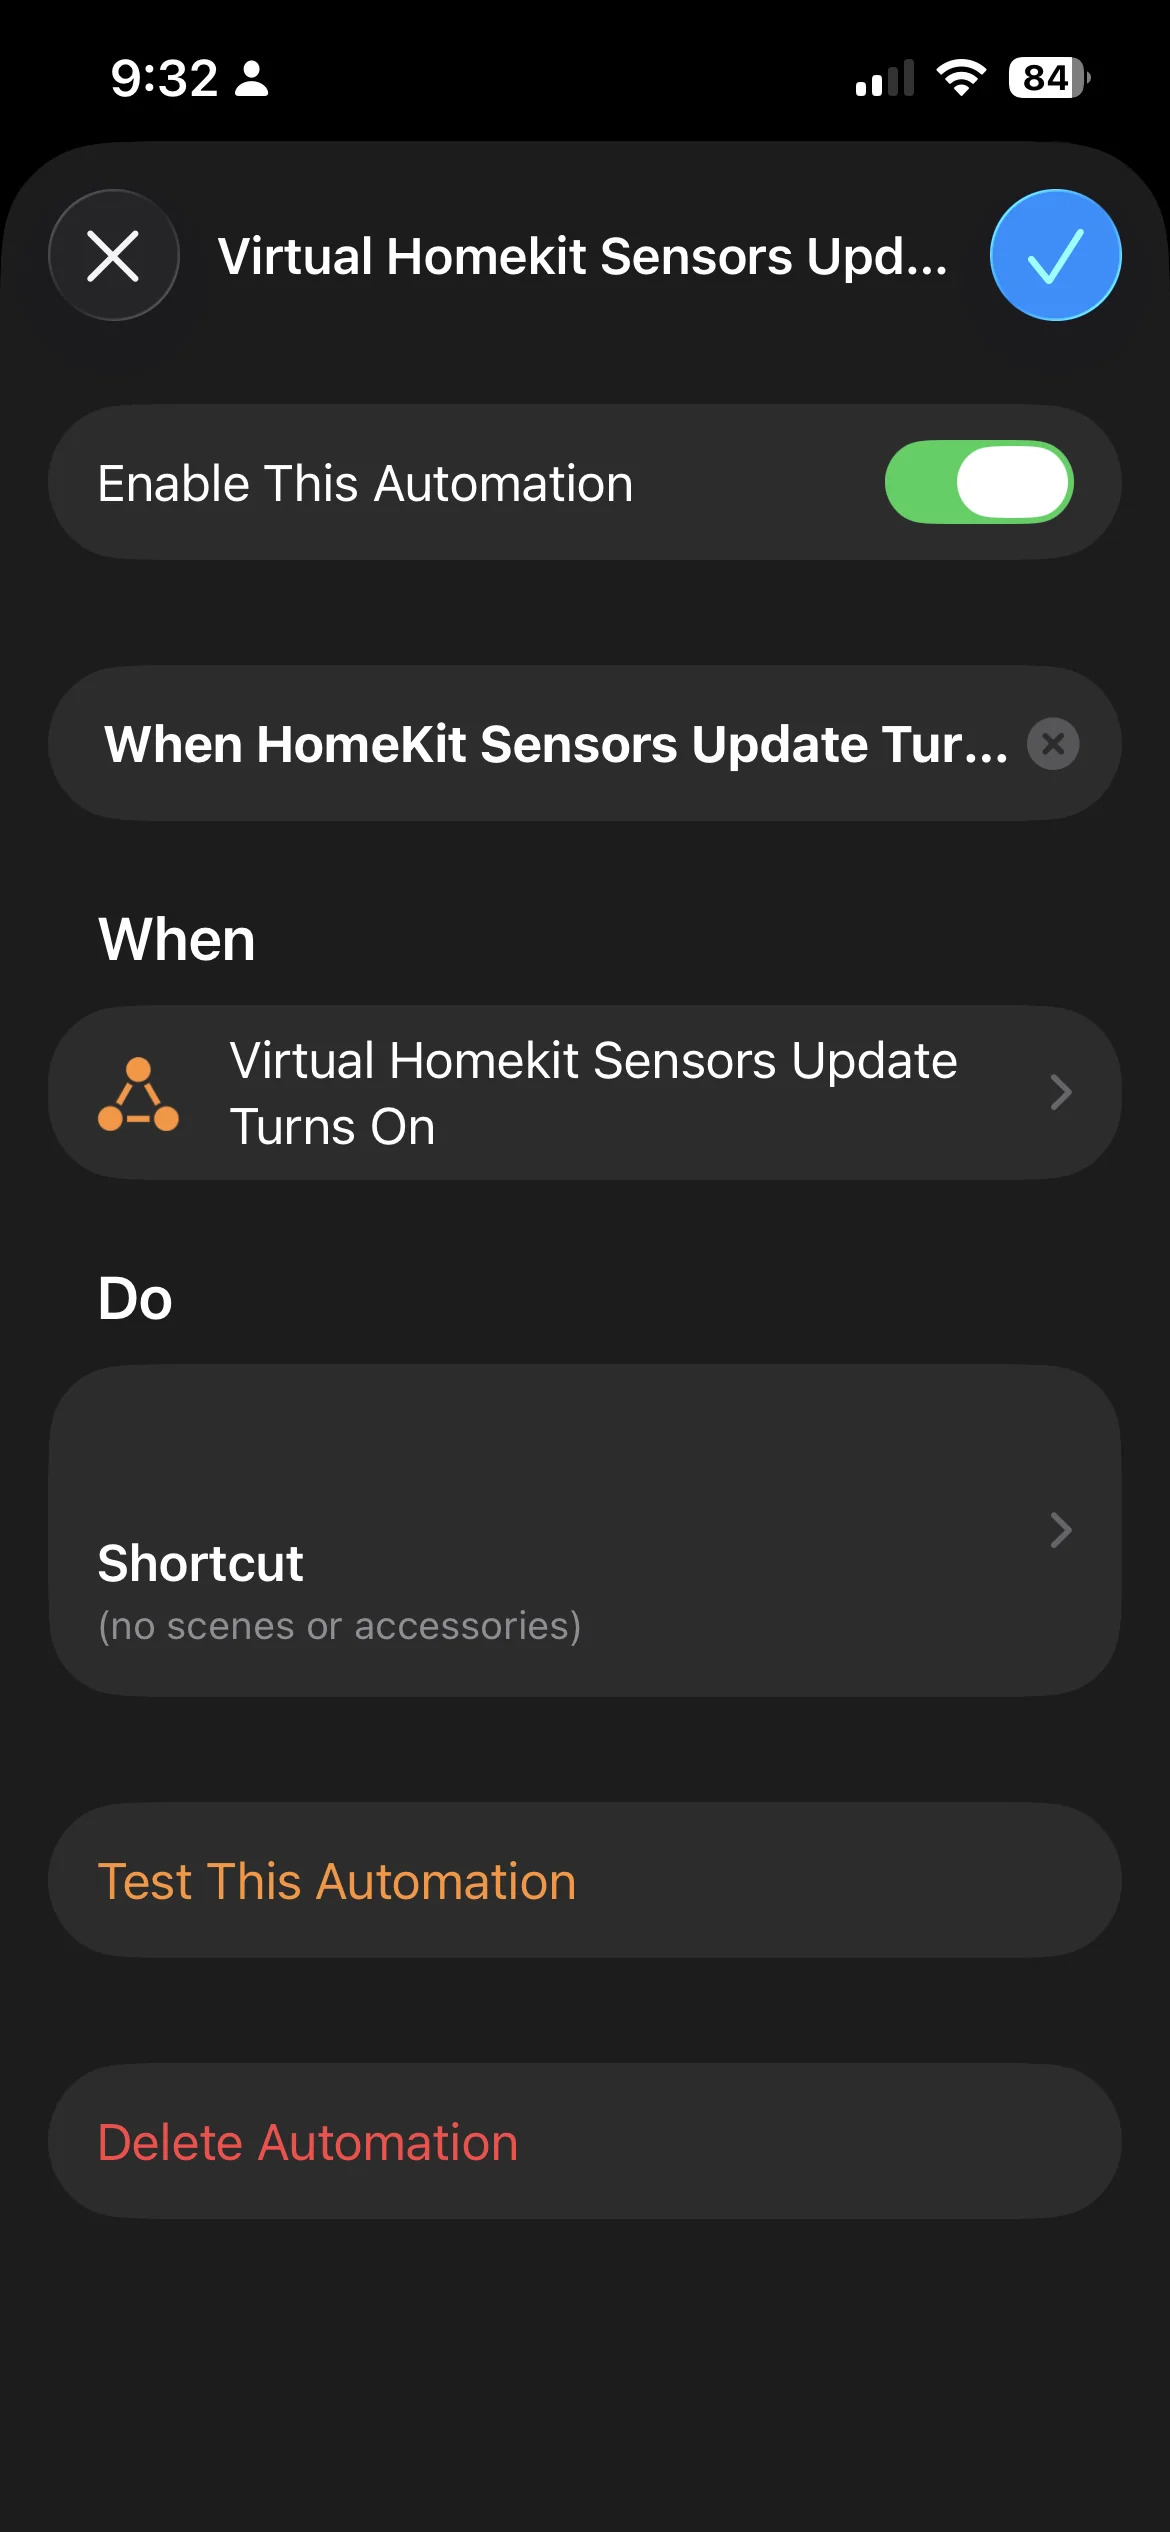
Now build out the shortcut:
- Add a Get action to read the current temperature from your HomePod. Pull up the panel by the handle above the search bar, select Home, then Get Status. Tap the placeholders to select your device and choose Current Temperature.
-
That value needs to be stored temporarily. Add a Set Variable action: pull up the panel, select the Scripting filter, and scroll to Set Variable. Give the variable a name and set its value to the temperature from the previous step.
-
Repeat for humidity.
-
If you have multiple HomePods, repeat everything for each one — use a unique variable name for each device and each measurement type.
Step 6 — Set up authentication
Add a Text action and paste in your Home Assistant Bearer token. The format should be:
Bearer eyJhbGciOiJIUzI1NiIsInR5cCI6IkpXVCJ9...
The word Bearer, a single space, then the token — no trailing space.
Then add a Set Variable action. I call mine Bearer Token. Set its value to that text node.
Step 7 — Send the values to Home Assistant
A word of warning before proceeding: check your typing carefully. A stray space can be surprisingly difficult to troubleshoot.
Add a Get Contents of URL action.
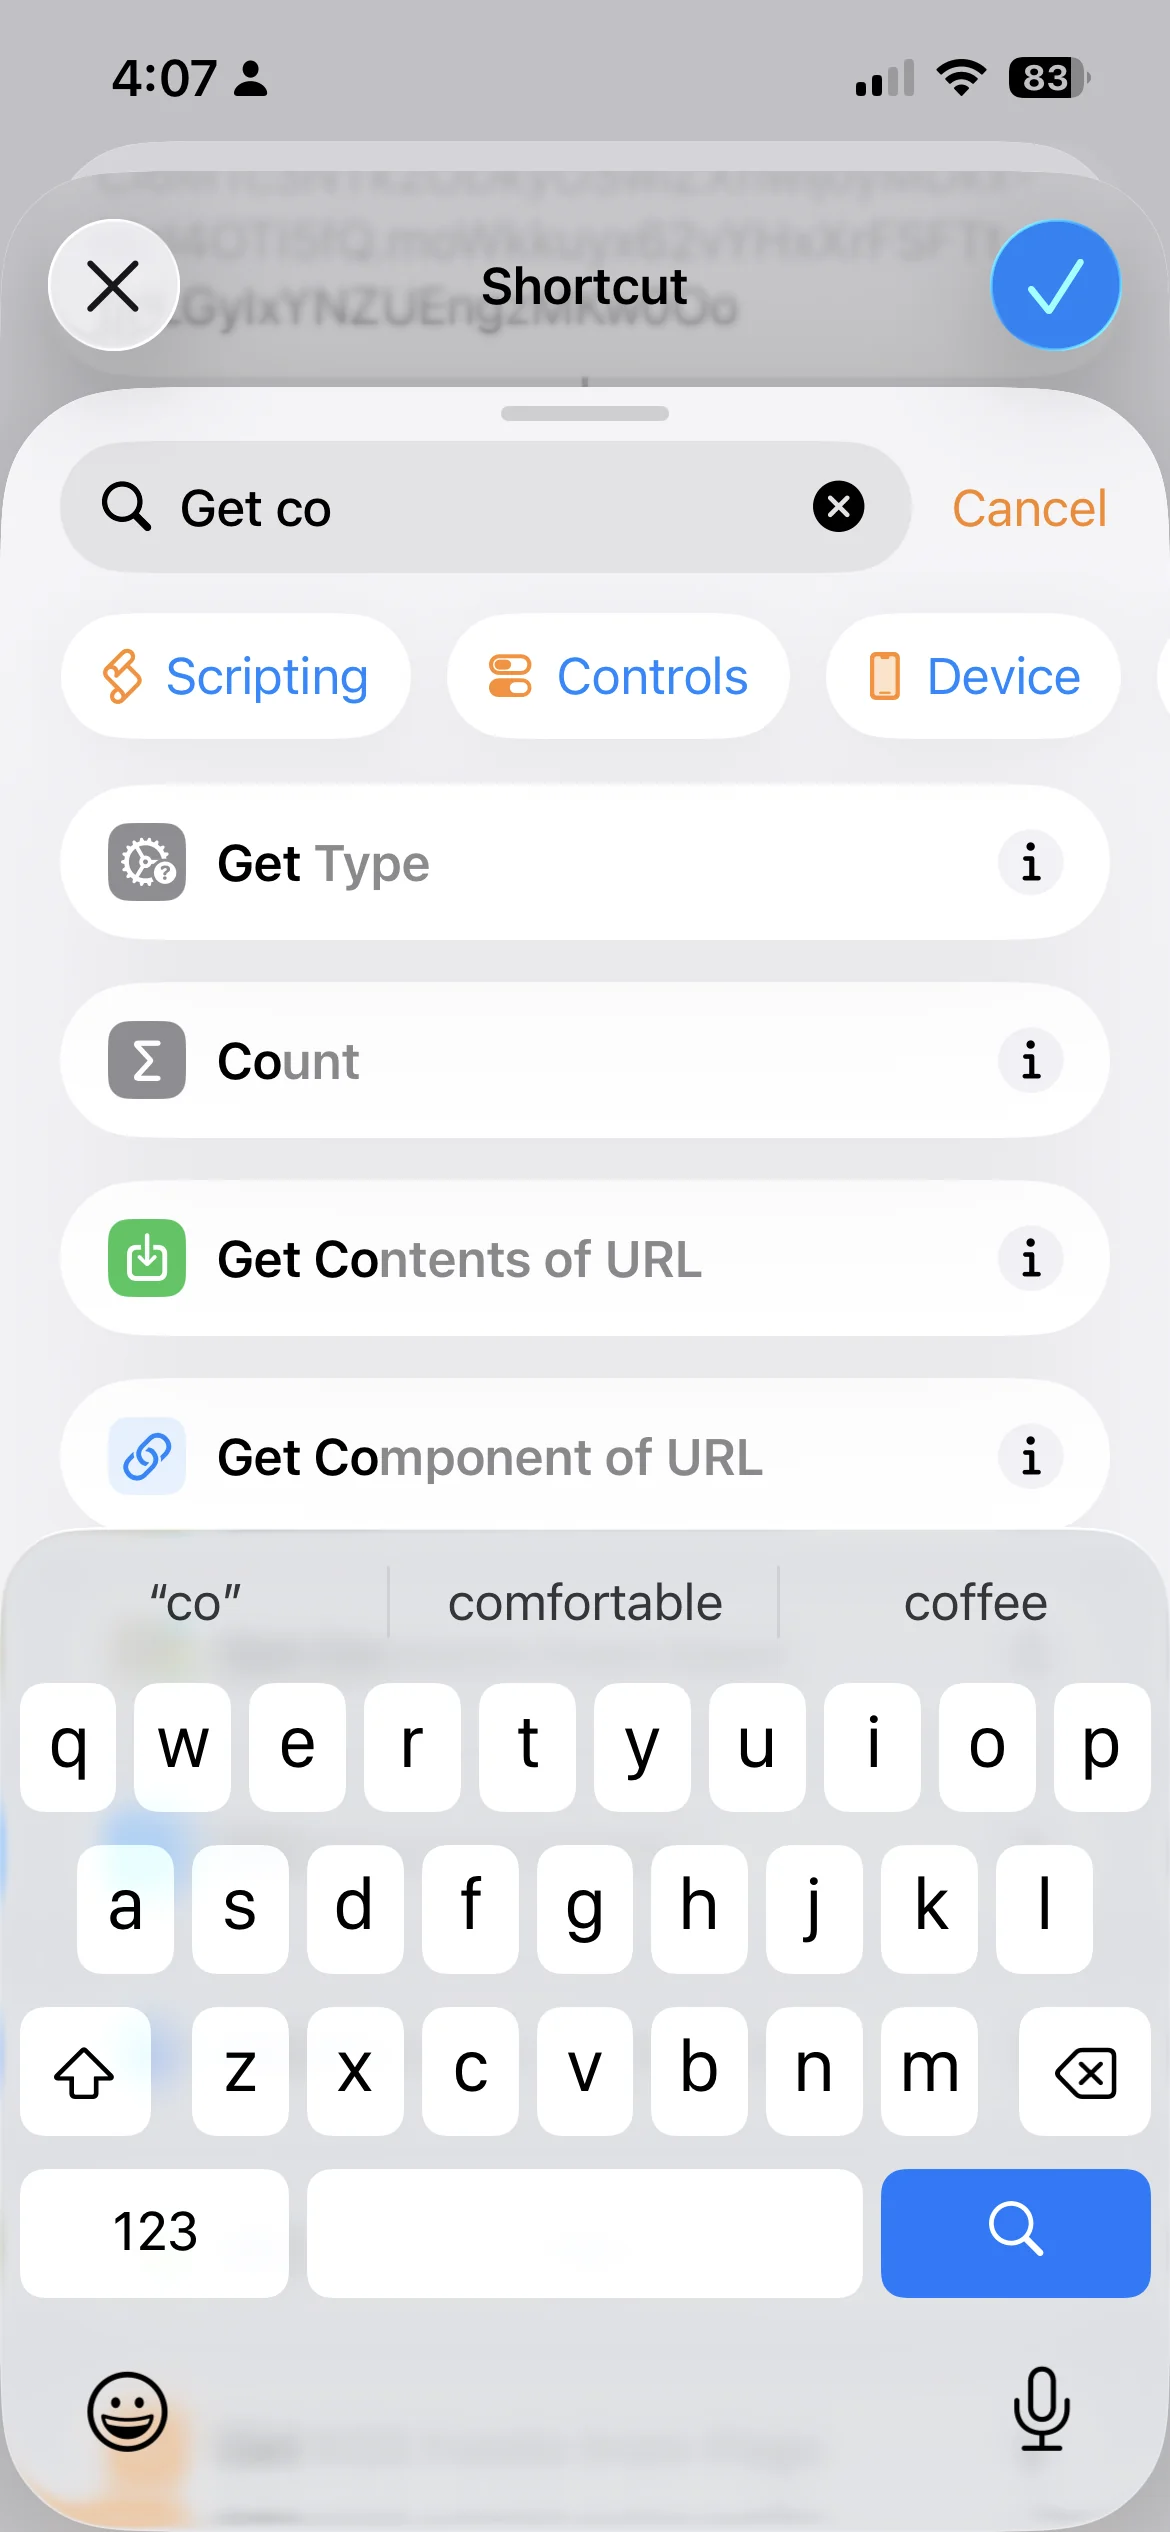
Configure it as follows:
- URL: your Home Assistant server, pointing at the HomePod entity. For example:
http://192.168.1.21:8123/api/states/sensor.office_homepod_office_temperature - Method: POST
- Headers: add a key called
Authorization, with the value set to your Bearer Token variable. If this token changes in future, you only need to update it here. - Request Body: JSON
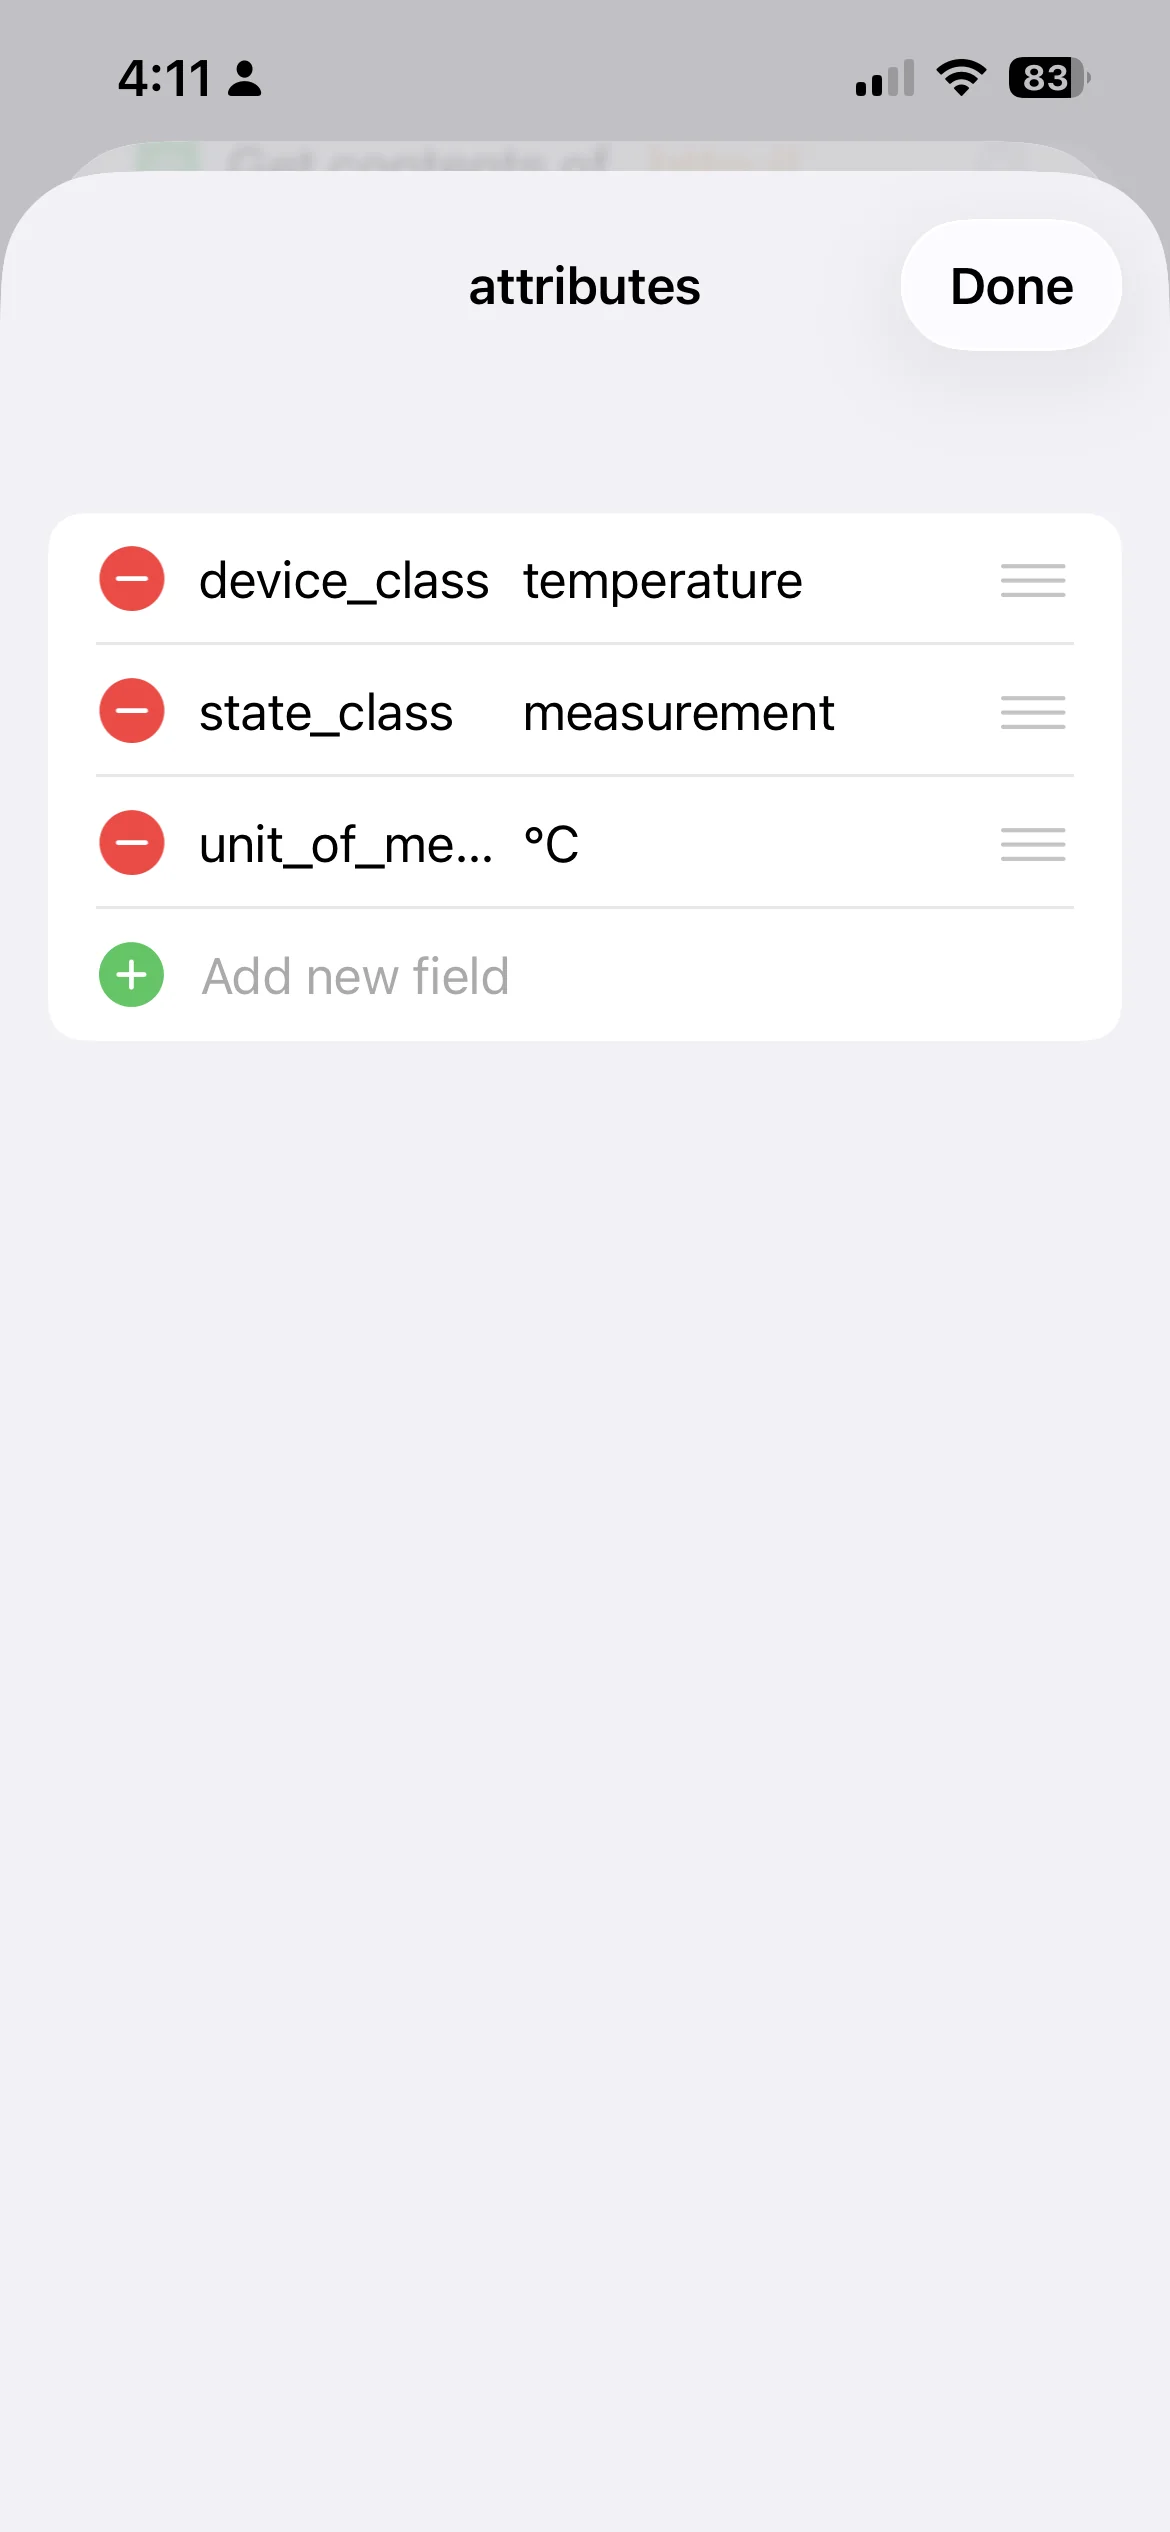
In the JSON body, add a dictionary with these entries:
| Key | Value |
|---|---|
device_class |
temperature |
state_class |
measurement |
unit_of_measurement |
°C or °F |
Hold the zero key to type the degree symbol (°).
Back out of the dictionary view, then add a State entry set to the temperature variable you created earlier.
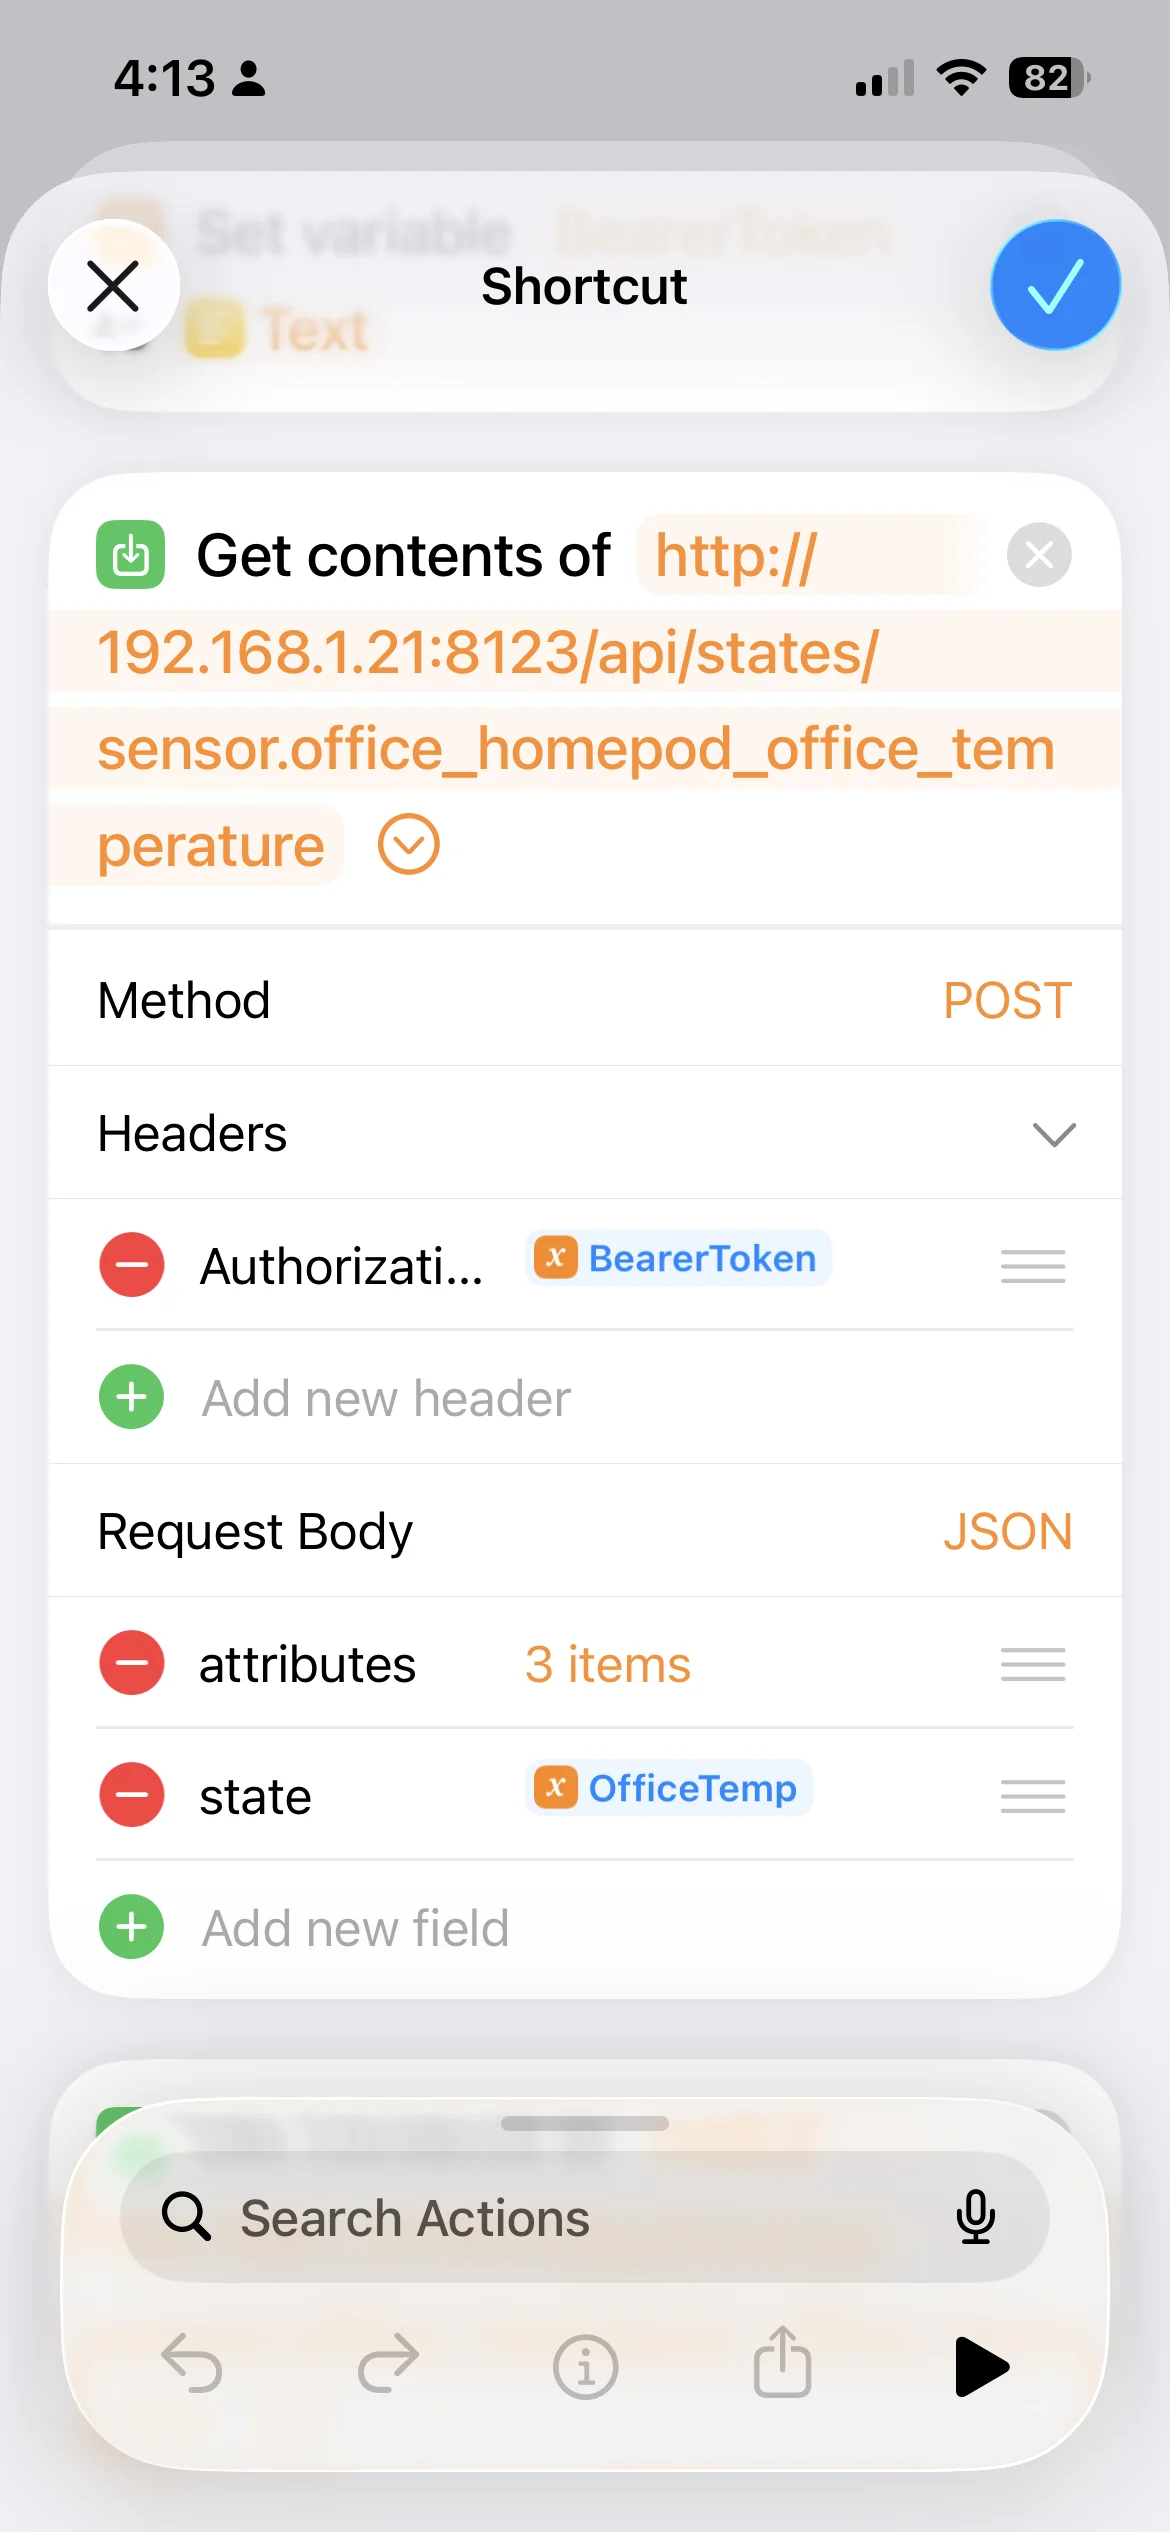
Confirm and close. Temperature readings from your HomePod are now being sent to Home Assistant every two minutes.
For humidity, go back into the shortcut and add another Get Contents of URL node pointing at the humidity entity:
http://192.168.1.21:8123/api/states/sensor.office_homepod_office_humidity
Repeat the same configuration with device_class set to humidity and unit_of_measurement set to %.
That’s it. Temperature and humidity values are now attached to the HomePod entry in Home Assistant.